
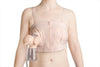

annKnowing how to clean breast pump parts correctly protects both mother and baby. Clean equipment prevents bacteria, mold, and leftover milk from contaminating fresh milk. Because breast milk is nutrient-rich, even small residues can quickly grow harmful germs.
The CDC warns that unclean breast pump parts may lead to serious infections in babies. Following proper hygiene steps keeps every feeding safe.
This guide breaks down the CDC-approved routine into simple steps and includes a printable checklist to make cleaning effortless.
Step 1 – Before You Begin: Preparation & Mindset
Before learning how to clean a breast pump, take a moment to prepare your space. Start by washing your hands with warm water and soap for 20 seconds, then dry them with a clean towel.
Set up a dedicated cleaning area away from food prep zones. Avoid the kitchen sink or cluttered counters where bacteria can spread. Use a separate basin just for pump parts.
Gather what you need: soft bottle brush, mild dish soap, and drying rack. Stick to food-safe cleaners, never bleach or sprays. Preparation keeps every cleaning routine safer and easier.
Step 2 – Cleaning Routine After Each Use
Learning how to clean breast pump parts properly after every session protects your baby and keeps your pump working well. Begin by taking the pump apart and separating every milk-contact piece – flanges, valves, membranes, and connectors. Rinse off milk residue under warm running water using a dedicated basin or clean bowl to avoid contamination from the sink.
Next, choose your cleaning method. For handwashing, fill a basin with hot, soapy water and scrub with a soft bottle brush. For dishwashing, place parts on the top rack only and use a hot cycle with heated drying. Rinse thoroughly afterward to remove soap buildup that could affect milk quality.
Air-dry all pieces completely on a clean towel or drying rack. Never use a cloth or paper towel to wipe parts since these can transfer germs. Allowing parts to dry fully prevents mold and keeps your breast pump safe and ready for your next pumping session.
Step 3 – Sanitizing Routine (Daily or Weekly)
Even when you know how to clean breast pump parts properly, sanitizing adds another layer of protection. It kills lingering germs and helps keep your baby safe – especially if they are a newborn, premature, or have a weakened immune system. For healthy, older babies, sanitizing can be done weekly, but daily cleaning is ideal during early months.
There are several safe ways to sanitize. The most common is boiling: place pump parts in a pot of boiling water for five minutes. You can also use microwave steam bags, electric steam sterilizers, or UV sanitizers for faster results. Always follow manufacturer instructions and avoid sanitizing motor or electrical parts. Remember, sanitizing complements cleaning – it never replaces it.
After sanitizing, let all parts air-dry fully on a clean towel or drying rack. Again, avoid wiping or stacking wet pieces, as this traps moisture and can encourage mold or bacterial growth. Once everything is completely dry, store the pieces in a clean, covered container to keep them ready for your next session.
Step 4 – Safe Storage Between Sessions
Once you know how to clean breast pump parts properly, storing them safely between sessions keeps your routine hygienic and efficient. Always make sure every part is completely dry before putting it away. Even a small amount of trapped moisture can lead to mold or bacteria.
Store clean, dry parts in a sealed, food-safe container, zip-top bag, or dedicated box. Keep these containers separate from general kitchen items to prevent cross-contamination. For busy moms who pump multiple times a day, clean and organize parts in advance to make reassembly faster and easier.
Some moms use the fridge method between sessions. This means placing freshly used pump parts in a sealed bag or container inside the refrigerator instead of washing them right away. It keeps milk residue cool and slows bacterial growth. However, this is only safe for short breaks, ideally less than 24 hours, and parts must be washed and sanitized thoroughly at the end of each day.
Step 5 – Common Mistakes to Avoid
Even when moms know how to clean breast pump parts, small oversights can lead to contamination or damaged equipment. The good news is, these are easy to fix once you know what to watch for.
Even after careful washing, some moms accidentally place parts directly in the kitchen sink or dry them with towels. It’s worth repeating – sinks collect germs, and towels can transfer bacteria. Always stick with your clean basin and air-drying routine.
You may also be tempted to skip sanitizing if your baby is older, or to reassemble parts before they’re completely dry. Resist the urge. Moisture and skipped steps allow bacteria and mold to grow. And if you notice cracks, discoloration, or cloudy spots, it’s time to replace, not rewash. A few mindful habits make all the difference in keeping your pump safe and your milk pure.
Step 6 – Frequency Table (Printable Reference)
Learning how to clean breast pump parts is only half the process – knowing how often to clean and sanitize each piece keeps everything safe and effective. Use this quick reference guide to stay on track.
|
Part |
After Each Use |
Sanitize Daily |
Sanitize Weekly |
Replace |
|
Breast Sheilds |
✅ |
✅ (for newborns) |
Optional |
Every 3-6 months |
|
Valves & Membranes |
✅ |
✅ |
Optional |
Every 1-2 months |
|
Bottles & Containers |
✅ |
✅ |
Optional |
Every 6 months |
|
Tubing |
As needed |
As needed |
As needed |
Replace if mold forms |
|
Pump Exterior |
Wipe only |
❌ |
❌ |
As needed |
This reference helps moms track cleaning routines and replacements at a glance. Print it, laminate it, or tape it near your sink for quick daily reminders.
Step 7 – Special Circumstances
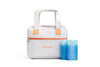
Sometimes, knowing how to clean breast pump parts looks a little different depending on where you are or what’s happening. When pumping at work, portable wipes, steam-sanitizing bags, or compact travel kits make it easier to clean quickly between sessions. These tools help moms stay consistent even when a sink or drying rack isn’t available.
During travel, try packing collapsible basins, soap sheets, and resealable bags to create a clean workspace anywhere. When water is limited, rinse parts with bottled water and finish deep cleaning as soon as possible. Store cleaned parts in a sealed container or bag until you return home.
If you’re sick, increase how often you sanitize, daily instead of weekly. Shared or hospital-grade pumps require special care, too. Always use your own tubing, bottles, and shields to prevent cross-contamination. A few extra steps in special situations go a long way toward keeping your milk safe.
Step 8 – Replacement and Maintenance
Even with perfect hygiene, every part eventually wears out. Knowing how to clean breast pump parts is vital, but so is knowing when to replace them. Over time, valves, membranes, and tubing lose elasticity or develop cracks that affect suction and safety.
Inspect parts regularly in good lighting. Replace valves and membranes every month or two, depending on use. Shields and containers last longer with proper care.
Avoid harsh chemicals or boiling motor parts. Stick to gentle cleaning, store parts dry, and keep spares handy to ensure your pump stays clean, efficient, and dependable.
Clean Pump, Healthy Baby
Knowing how to clean breast pump parts properly protects your baby and keeps your milk safe. With a steady routine, cleaning and sanitizing quickly become second nature. Consistent care prevents bacteria, extends your pump’s lifespan, and helps every session run smoothly.
Keep your checklist handy and following these CDC-approved steps for how to clean breast pump parts supports both your baby’s health and your peace of mind.
For more hygiene and baby care guides, visit our breastfeeding tips category.


